Posted on

Race Report 3: Micheline Raceway Road Atlanta SCCA Hoosier Super Tour

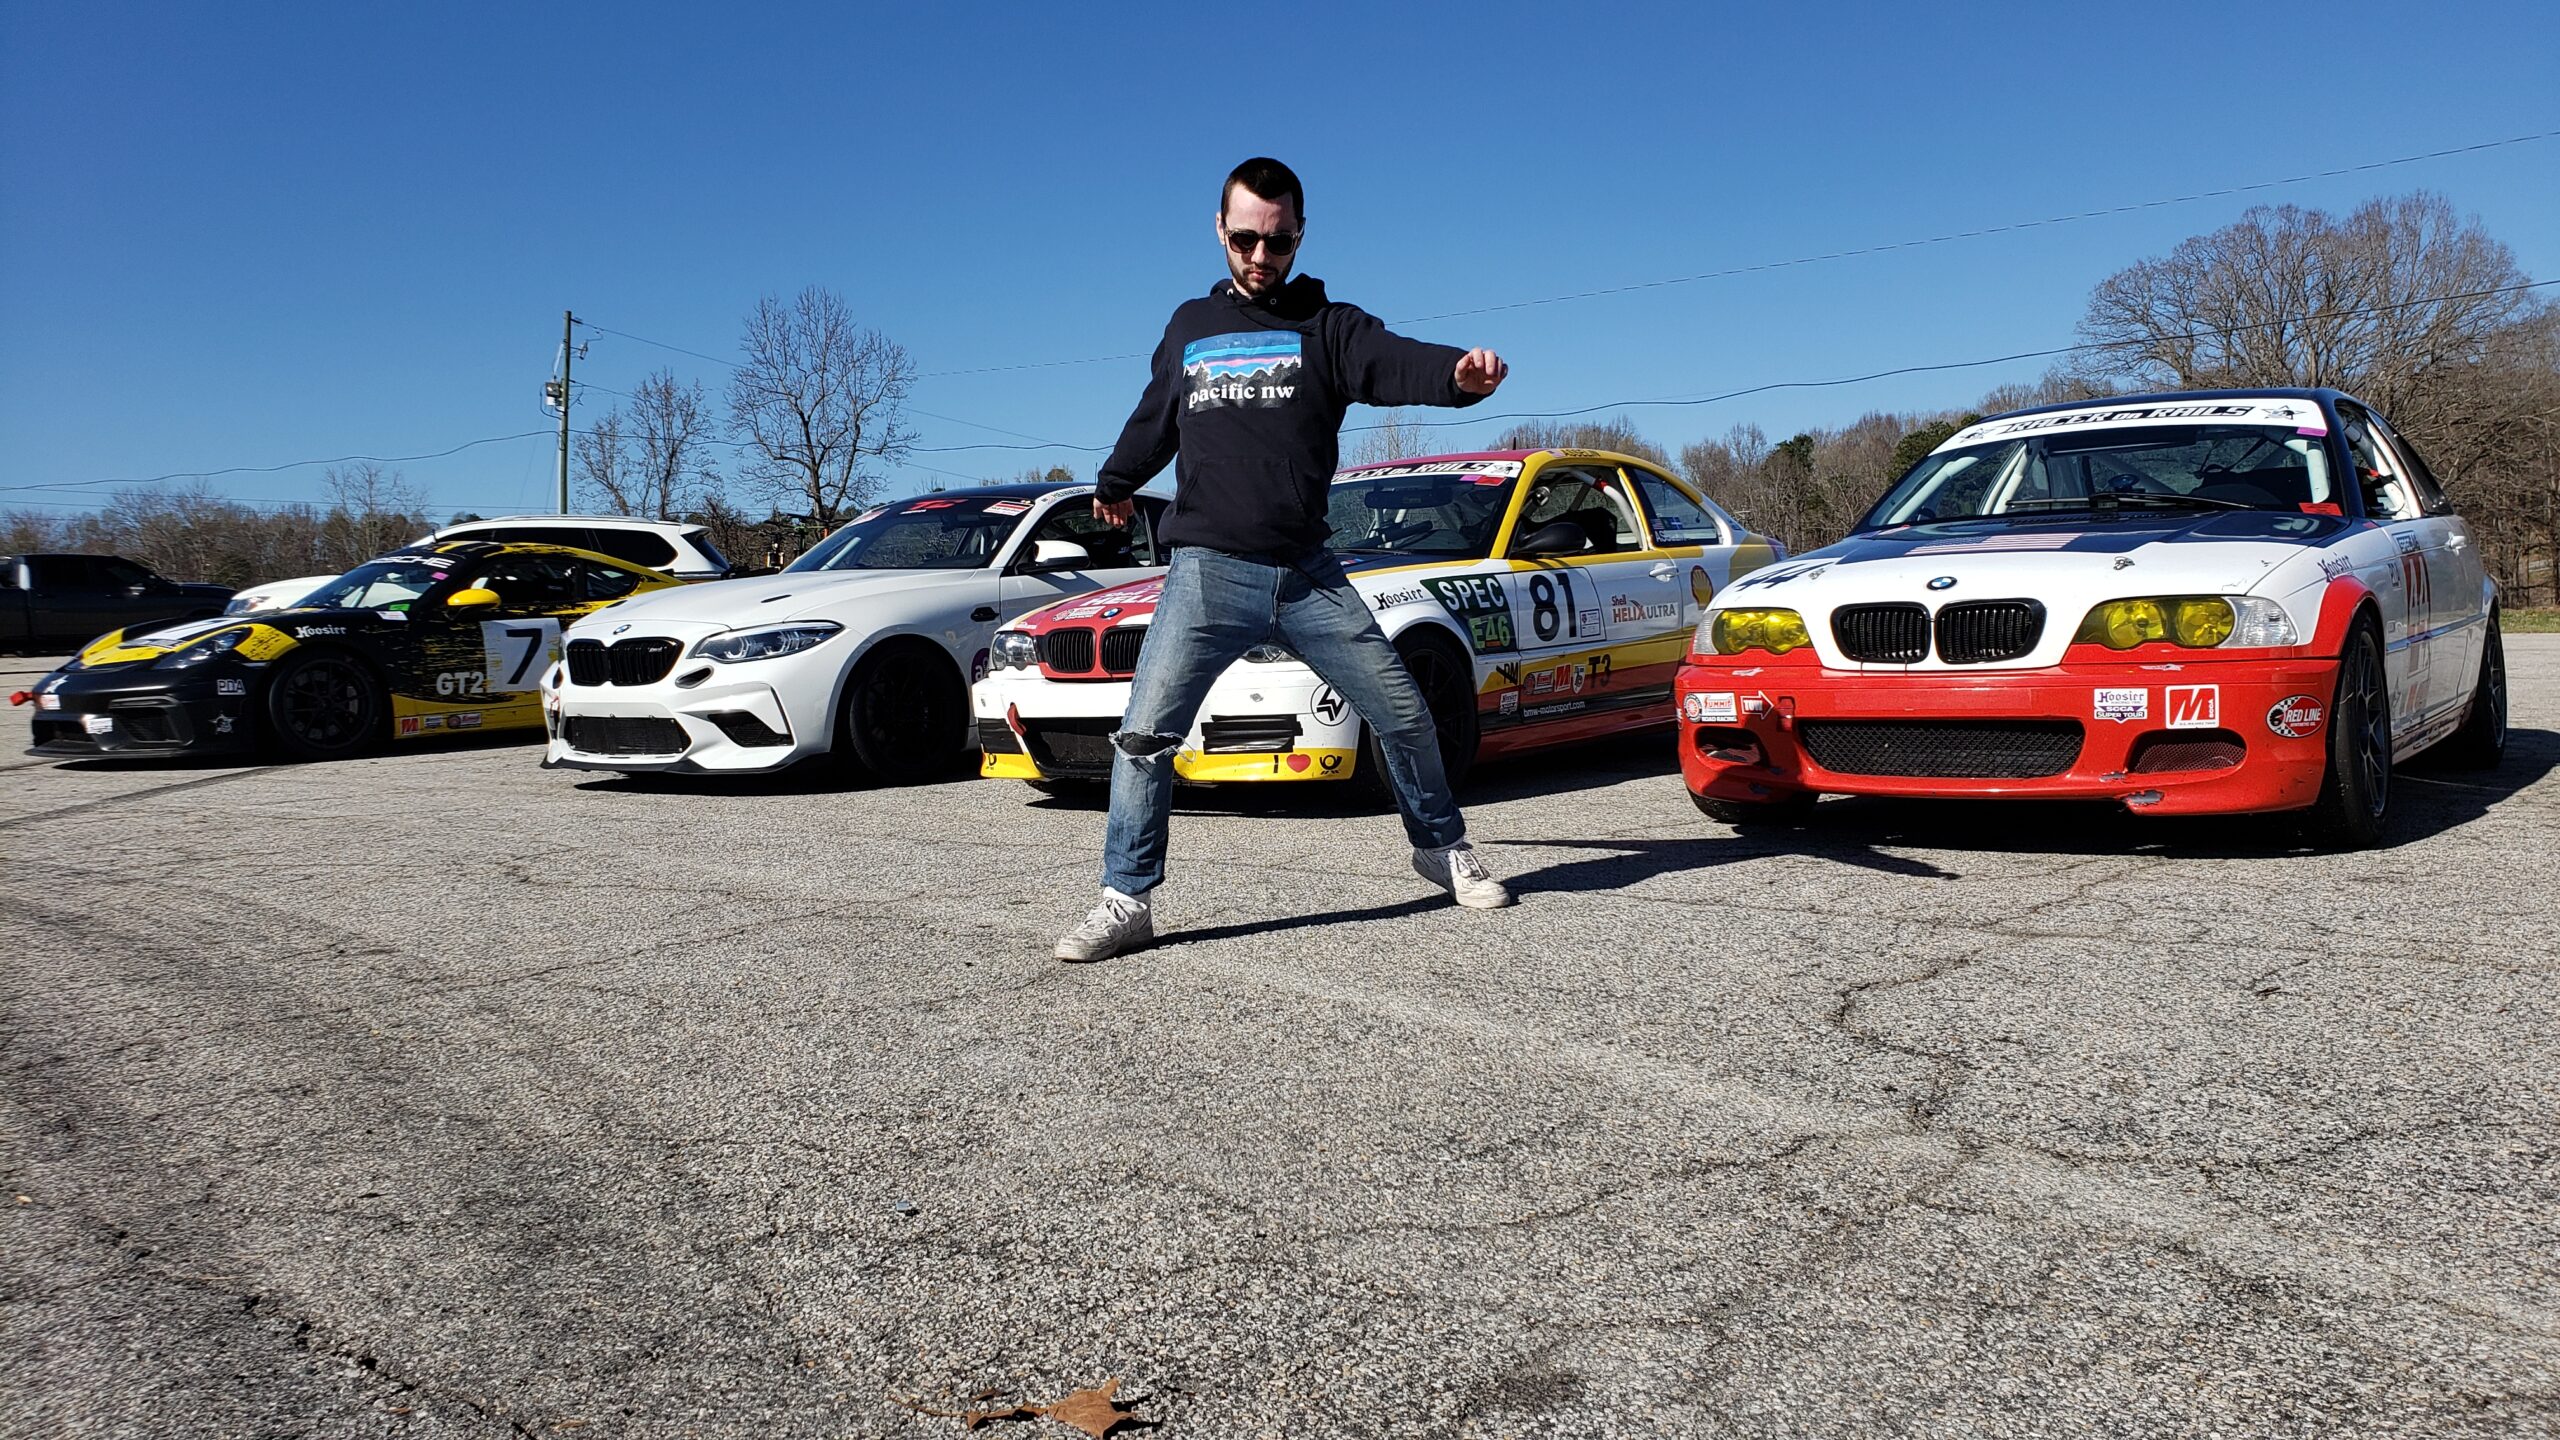
Tyler doing his Road Atlanta Happy Dance

The third stop in our 2022 race schedule and “Winter Sun Bird” trip took us to Michelin Raceway Road Atlanta! Extra emphasis on the quotes re the Sun Bird portion as that was the goal behind the trip – go chase the sun during the winter, warm up and hit some bucket list race tracks.

Want to know how the previous two stops went? Get caught up by checking out our Buttonwillow and Circuit of the Americas Race Reports.

Rolling into the Road Atlanta main paddock on load-in day. Lifetime achievement unlocked!

For the third race in a row, the northern cold decided to chase after us! We landed on Wednesday, got everything staged up and finally got a full day’s worth of testing/practice on Thursday which made a massive difference for each driver in terms of getting up to speed on the track and a baseline direction for a setup.

On Friday we had an AM practice and a first qualifying session but while we were all catching some Z’s overnight, a massive weather system came through the area, dumping rain everywhere and putting on a solid light show. By the time the system had moved through, a deep cold front had settled in and we awoke to 22F air temps and snow flurries throughout the day.

Yes – it was SNOWING throughout the day, coupled with a friendly breeze that included 30-40mph gusts of wind that dropped the windchill into the mid-teens. We still got out there and made progress but that might have been one of the toughest days for drivers and crew to be at the track – bone chilling air temps, super cold track, multiple laps needed to warm up tires and nice and slick grass waiting to give anyone who dares come off the track surface, an express trip into the comfy arms of the walls surrounding the Road Atlanta.

Thoughts on Road Atlanta as a circuit

This was the first time for all but one driver to drive Road Atlanta but that one driver only had a half lap under their belt from the previous experience because of black flag incidents of people going off spectacularly. This ended up being an indicator of things to come for our weekend as well.

Sunset shot of Turn 5 at Michelin Raceway Road Atlanta – the uphill exit elevation change is MUCH larger than it seems from in-car videos and even this picture.

For those that are from the Pacific Northwest, Road Atlanta has a similar feeling and characteristics to Pacific Raceways – it’s old school. Both tracks were built and opened up in the 1960’s/1970’s and are filled with mostly medium speed to high speed corners. All corners and segments are high commitment with an emphasis on getting into a rhythm and flowing speed into the corner.

The slowest corner at Road Atlanta is Turn 7 with a minimum speed in our cars of around 47-50mph and multiple corners with minimum speeds of 70 and 90mph at the apexes.

The back straight from Turn 7 to Turn 10a is about as long as front straight away of Pacific Raceways – pretty dang near terminal velocity for many cars.

Looking back counter-course to Turns 10a and 10b at the end of the back straight away where the goal is to brake as late as possible while still clipping the apex curbs hard and getting to full throttle as soon as possible past the 10a apex.

While each driver had at least 10 hours of simulator preparation and training before the weekend, everyone had at least a little shock when we finally got on track. Here are a few comments from the drivers after the first couple of sessions:

  • The elevation changes from entering and exiting the esses are real and much more dramatic than it seems from in-car video.
Looking back at the entry of the esses, counter-course. Picture is taken from the hillside on driver’s right and about level elevation to the entry of the esses.
  • Use as much of the exit curbing of Turn 5 is critical but if there’s gravel or the painted surfaces are wet, forget about it. The car is already barely holding on as it goes through bumps and any extra steering input or unanticipated wheel spin and the car can come around real quick.
  • The elevation drop for braking at T10a is real – it takes a few laps to gather the confidence to brake where you can in the simulator but that compression helps slow the car down.
  • The hill at Turn 11 and more importantly, the downhill run from it afterwards is STEEP! Like very, very steep. As you crest over the hill, there is nothing to see but the bridge and the sky – is a similar feeling to the bypass or the crow’s nest at Thunderhill but you stay full throttle flat the whole time and are in 5th gear shortly after the peak.
  • Staying flat at Turn 12 is ‘easy’ in the simulator but not so much in real life. Some drivers got near staying flat throughout the weekend but with it being the first time racing here, slick grass conditions and MANY cars that met their ends on the front straight (and ruined multiple sessions and races), we decided to optimize for completing the weekend and having all the cars in one piece.
Dave and Simon bombing through Start/Finish in their Spec E46’s in Touring 3.

A weekend of massive breakthroughs and results!

The goals for these race weekends have been simple: 1. Have fun and 2. Become better drivers.

We’re firm believers in that when we focus on the improvement process and having fun, the results will come on their own and that belief continues to pay dividends.

Spec E46’s in Touring 3 Class

Both Dave and Simon put in 10+ hours of simulator training before weekend so from the start, they knew where they were going but with the conditions being extremely cold on qualifying day 2 and race 1, the biggest challenge for both was trusting that the car could do what they’ve done in the simulator and seen some of the super talented drivers in the Southeast do on race weekends.

Simon took the approach of picking out one single corner and with the help of Ray Phillips, sending it harder than he had sent it before and more than he felt like the car could do but trusting in the guidance from Ray and that the car could handle it. The result? During Race 1, Simon sent it into Turn 5 faster than he had done in any session and was so committed that he stayed flat through the whole exit and even through an almost opposite lock correction AND that ended up being his best lap time of the race.

From then on, he built on that confidence to establish a new normal, made some moves and ended up with his first race win ever and at Road Atlanta in an SCCA Super Hoosier Tour race! WOW!!!

Simon driving through Start/Finish on the final lap of Race 1 to claim his first race win at Road Atlanta!

Dave had been chipping away at rebuilding his pace after the rollover at Buttonwillow to start the season. It might seem like a simple thing – you have a major incident, no major injuries – just jump right back in right? Well that’s exactly what Dave did but even then, it still takes some time to work through the mental blockers of simply sending it and trusting the car and track will hold.

On Sunday afternoon, the biggest breakthrough came with Seth Thomas on the radio coaching him through traffic and making moves. Unfortunately Dave’s battery was low and when we finally were released from grid, the car wouldn’t fire – so we had to push start his car which meant he’d start the race at the back of the entire field which isn’t great but that might have been the extra fuel for letting things go – what was there to lose?

With Seth’s help, Dave turned it up, made pass after pass, improved his personal best lap time by nearly 3 seconds and finished in P2 after Simon had contact during a FCY restart and did a precautionary drive through the hot pits to make sure the car was safe to continue racing.

Simon and Dave making up a Racer on Rails double podium on Sunday!

To top it all off, we found out after the weekend that P3 on the Saturday race was disqualified so Dave ended up with two podium finishes at Road Atlanta!

Porsche Cayman GT4 Clubsport in GT2 Class

Ann came into the weekend looking to build on the gains she made at Circuit of the Americas and did she ever! Similar to Dave and Simon, Ann had multiple mini moments of simply letting go, trusting the car and driving the pee brains out of her car.

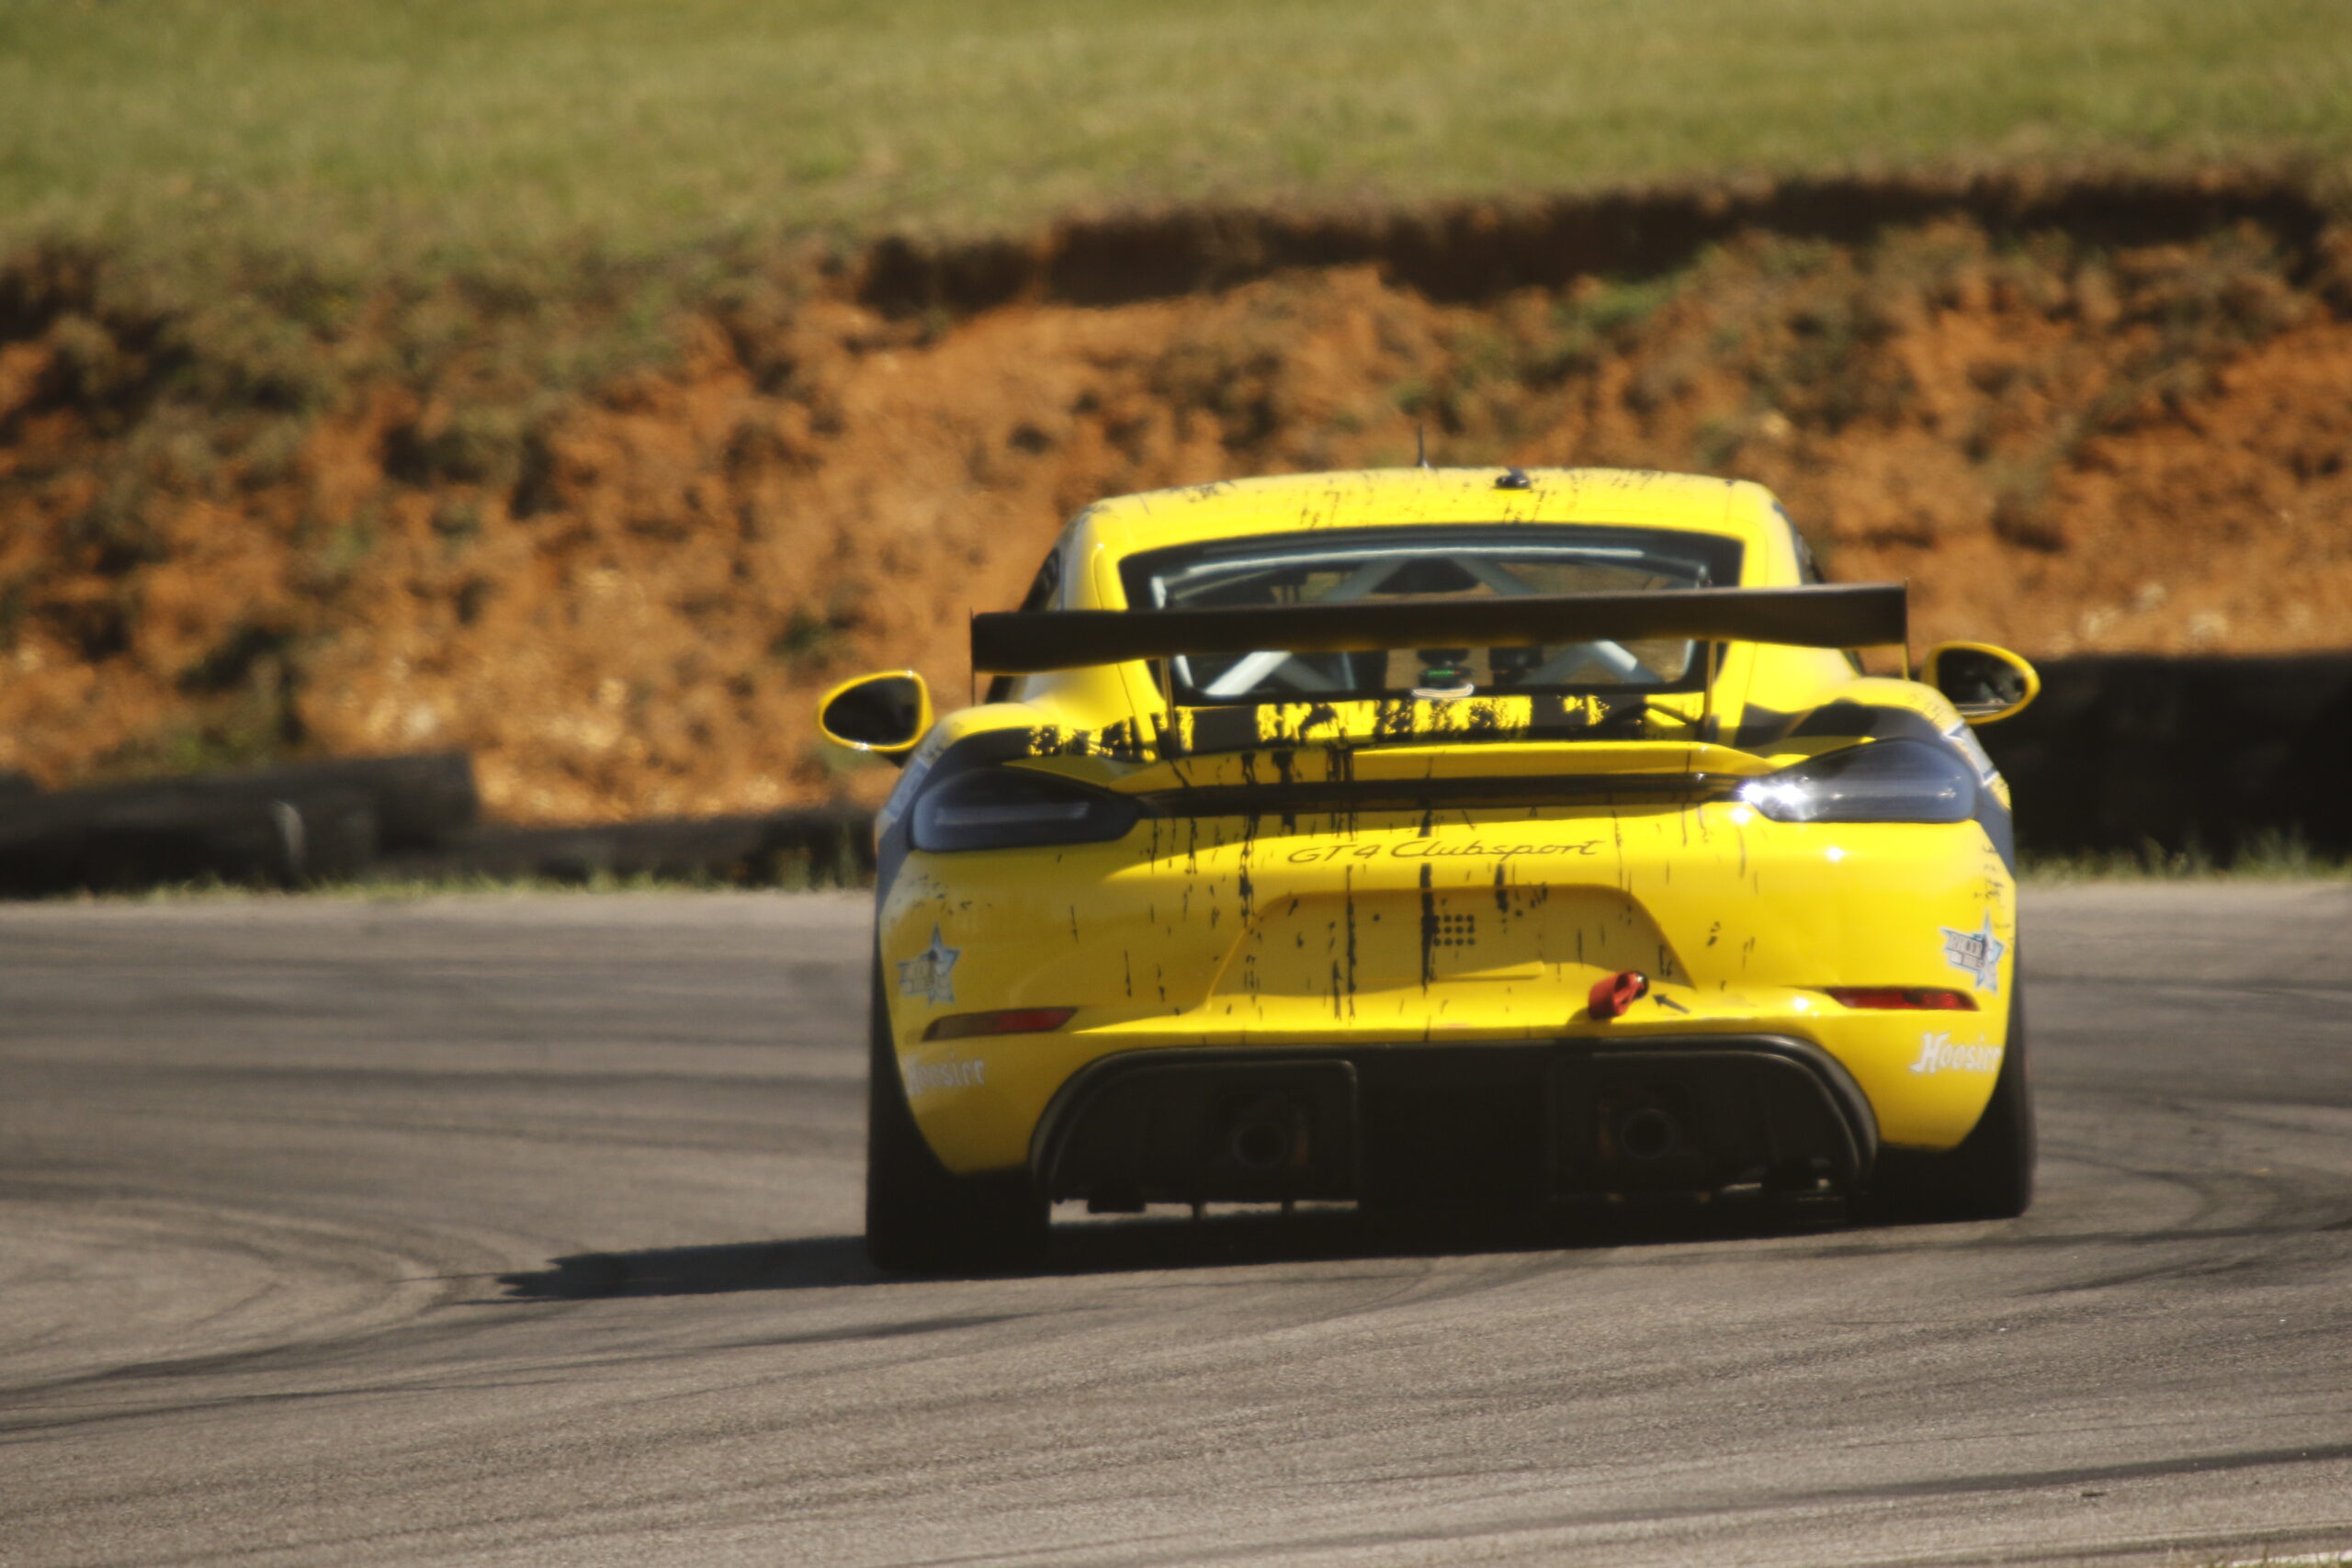
Ann’s Porsche Cayman GT4 Clubsport exiting Turn 3, squatting and putting down the power! Chris Green | ChrisGreenPhoto.com

In each session she found more and more pace. Saturday’s Race 1 looked like it would be the big breakthrough but traffic hurt her start and a high horsepower Corvette got around her which ended up being nearly impossible to get around once it got in straight line. Further, the race had 3 lengthy full course yellows and in the end, there was 5-6 actual flying laps in the race.

For Race 2 on Sunday, the air had warmed up and the races had gone green flag for most racing laps and Ann turned it on. Per Ann, she let her car do her thing and switched from trying to force the car to do things and instead let her free. Her personal best lap time dropped by nearly 2 seconds from the prior day, moved up 4 positions into P9 overall, P5 in GT2 and she had the pace for a P3. At the rate Ann is developing, she’s going to need to start making room in her bags for souvenirs.

BMW M240iR running in Touring 2

This was the second race weekend with the M240iR but the first knowing ahead of time that this would be the car. I (Gama) put in several hours of work in the simulator before the weekend and had a good sense of how the car would handle. At the end of the test day, I got a 4-5 window of traffic free laps to establish a consistent pace and on the prior weekend’s race tires. The pace looked good and we knew there was a bit more on the table with fresh tires and maybe a draft here and there. The big question was the track conditions.

Friday AM we scrubbed in a new set of tires so that they were prime for Qualy 1 on Friday afternoon. The whole day we were watching the weather and knew showers were in the order. Apparently the locals or regulars knew something was up because a race broke out on the out-lap and we completed one flying lap. I ended up backing up to give me space for a lap and potential second one but as we were halfway through the second flying lap (and I was almost a second up on the first lap), black flag came out and back to the hotpits we went. We ended up being released and I went out but the track had too much rain on it and was considerably slower (braking for 10a to test the track limits was “interesting”).

Gama testing the limits of the exit curbs of Turn 12

The Touring 2 field was small and there was a split start between the Touring cars and the ST cars so the net impact was negligible but it was still disappointing to not be able to put together a proper flying lap.

On Saturday, we were the last race group and while the snow flurries had cleared, the cold clear winter air started cooling down and it was a brisk 30F by the race start. It was so cold that the M2CS in P3 of Touring 2 spun right as we exited pit lane and went head first into the wall. Luckily the driver and car were okay and able to make the race but a lap down.

The two Porsche’s in P1 and P2 were well prepared and optimized for Touring 2 class as we saw right away their ability to stretch legs in 4th gear and pull away. It was clear that at the very best we could hope to stick close enough to catch a bit of draft and capitalize on a mistake if it were to come up. The race was plagued with FCY’s and only a couple laps after a restart, a Honda Civic lost it on the exit of T12 and made contact with the walls, ending the race under a black flag all.

Gama and Ann patiently waiting to be let loose at pre-grid during the Thursday test day.

On Sunday we got warmer weather and thankfully, many more racing laps. Started P3 and held P3 at the start with little contention but once again the Porsche’s ran away and there wasn’t much pressure from behind so the focus was on putting down consistent and fast laps. A few laps in, a FCY that last only 3 laps.

On the restart, my goal was to stick with the Porsche’s through the first sector where we had a better shot and be on their heels for the long back straight but as I got a jump on the Cayman, I had to move to the left to avoid tagging his rear. In doing so, I left a lane open on the inside of which the BMW M2CS pounced on and while I quickly reacted and moved to cover the lane, he had already established overlap or close enough to it that I had to concede the space.

Restart 1 of the Sunday race with the BMW M2 CS getting a run and the inside line through Turn 1. Chris Green | ChrisGreenPhoto.com

We went side by side all the way up to Turn 3 but he had the inside and it’s near impossible to go 2-wide into the esses with any speed so I gave up the position.

The rest of the race was a similar story to COTA where I was able to stick with the M2CS, eating up most or all of the gaps in the corners but the M2 having just enough additional straight line speed to pull away.

There was a point with a couple laps to go where we were catching lapped traffic and I saw the opportunity to box him in on the exit of Turn 10a behind the lapped car and impact his ability to accelerate. The move worked but the M2 still had the low end torque to squeeze through the two cars and that was the end of the race – P4 and less than a second away from P3.

Gama on the bumper of the BMW M2CS in the #110 Racer on Rails 2015 BMW M240iR at the finish of Sunday’s Race 2.

The written description not enough? Watch the whole race!

YouTube player

All in all, a great weekend for the Racer on Rails Team as the cars ran well all weekend, drivers improved and we took home a collection of hardware!

Racer on Rails team signing off from Road Atlanta! From left to right: Seth Thomas, Simon Asselin, Tyler Campbell, Ann Doherty, Ray Phillips, Gama Aguilar, Dave Orem, Bryce Allen, Memo Calderon, Jordan Allen, Reid Morris.

Our next stop takes us to Virginia International Raceways on April 7 – 10, 2022. Can’t wait!

Posted on

Race Report 1: Buttonwillow SCCA US Majors January 14 – 16 2022

Fully loaded team for SCCA weekend at Buttonwillow

2022 is going to be a busy and exciting race schedule for the Racer on Rails crew and the first stop was this past weekend at Buttonwillow Raceway Park.

Note, originally we were supposed to be at Sebring International Raceways for the SCCA Hoosier Super Tour but the beautiful white Christmas we had in the PNW overstayed its welcome and by the time we need to have the trucks on the road to the SE, all the passes out of WA were closed due to blizzard conditions and the alternate route going down the west coast and across the SW was riddled with freezing or snow conditions in New Mexico, Texas and even parts of Alabama.

So with about 10 days’ notice, we made the change to instead to go sunny southern California where last year, we attended this same race but it was held at Autoclub Motor Speedway in Fontana, CA.

The Team

For the first race, we had three Spec E46’s running in Touring 3 (T3) trim and one Porsche Cayman GT4 Clubsport running in GT2 class.

Racer on Rails drivers - 3 Spec E46's and one Porsche Cayman GT4 Clubsport
#44 Dave Orem, #81 Simon Asselin, #109 Gama Aguilar and #4 Ann Doherty

The normal crew of Jordan, Bryce and Gama were on hand but this was also the first official race weekend with our new Motorsports Director, Memo Calderon and our service advisor, Reid Morris.

The Fog

Not going to mince words here, it was a tough weekend and mostly due to dense fog that rolled in each night and resulted in each morning’s scheduled run groups to be postponed due to low visibility conditions.  One of the locals at one of the on-site race shops with a retail space mentioned that it had been close to 27 years since they had seen such thick fog and turns out that the volcano eruption in Tonga might have contributed to the fog conditions.

In the end, each day we didn’t get started on-track until 11am – 12noon. On the Friday test day, the run groups ran per the schedule as the organizer simply picked up when we started and had the 3 run groups doing 20 minute sessions each hour, until 5pm.

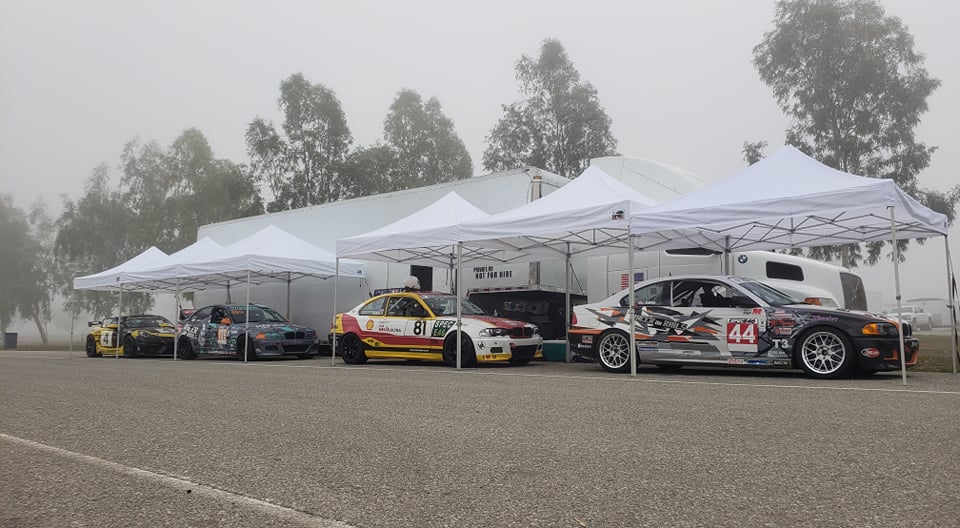
Racer on Rails cars ready to go on-track but under a fog hold on the Friday test day

Thank You Safety Equipment!

There is never a shortage of reasons to not skimp on safety equipment choices, design and preventative maintenance as we never plan on having an issue where safety equipment is needed but we’re always glad when it’s there and it works.

We had two incidents on the test day:

  1. Failed front-right lower ball joint in the control arm (SE46): The #109 SE36 running in T3 trim got a near complete overhaul prior to the 2021 SCCA Runoffs at Indy, which included brand new lower control arms. Unfortunately it got taken out on lap 1 of the race which resulted in a front end impact with at least energy going through the suspension components but not a direct hit or contact. All in, the control arm and lower ball joint had 1-1.5 hours of run time prior to this weekend. On the very first session when the fog broke, lap 2, braking for Sunset corner (the last corner before s/f), the inner lower ball joint failed and the car went plowing through the corner and came to a stand still on the exit of the corner. On top of needing to make repairs to get the car back up and running, it also caused a black flag which ended running for everyone else.
  2. Rollover on the exit of the kink before Phil Hill: With the fog and being in mid-January, the track was not just green each morning from fog moisture but also stone cold. It was 38F on Friday morning and barely broke 50F once the fog cleared for the afternoon. This meant really tough conditions in terms of finding grip and in the 3rd session of the test day, the #44 took the same line as in previous laps with maybe a tiny bit more steering angle, hit the curb of the kink like normal but this time it upset the car a tad bit too much and the backend came around. The car slid off-track and when it hit the dirt, which with the moisture and temperatures was more like mud, the wheels hooked into the dirt and the car barrel rolled. We’ll have another post in the future to dissect and share how the cage and all the safety equipment faired.

Making Lemonade Out of Lemons

New track, very limited run time and low grip conditions – what do you do? Make the most of it and work on the learning process! Expectations for big results are low, so instead focus on developing and that’s exactly what each driver did, with the help of driver coaches Seth Thomas and Ray Phillips!

Porsche Cayman GT4 Clubsport driver, Ann Doherty, studying the track notes and areas of improvement.
Ann D studying her track notes and mentally preparing for the next time on-track.

Through the coaching from Seth and Ray, each driver made progress across the limited running and culminated in a podium position for each driver! Below are some areas that were focused on throughout the weekend:

  • Squaring off corners better in low grip/wet conditions and to setup exit of the following straights
  • Timing of transitions from brake to gas and vice versa
  • Establishing a connection or translation layer between what driving Buttonwillow in the simulator felt like relative to real life
  • Mentality to have when going into a race with changing conditions (both getting worse and getting better)
  • How to explore grip when conditions are improving
Ray Phillips doing a quick debrief after a session while in post-session tech.

Moving forward to COTA in February

So we came out of Buttonwillow with 3 of the 4 cars running, 4 trophies, 1 race win, 5+ second improvements in dry running lap times from Friday afternoon to Sunday afternoon, a new T3 track record for Buttonwillow CW14 configuration with a 1:55.376 and ready for the next round at Circuit of the Americas February 4 – 6, 2022.

  • Simon made gains across both races and had an epic battle with a T3 Porsche Boxer, having led a good part of Race 2
  • Ann made a massive step from Saturday to Sunday, dropping 8 seconds in one day and snagging two podium positions in GT2
  • Dave had limited running due to the incident but was fully healthy after being checked out by medics and will be back on track for COTA
  • Gama won race 1, broke the track record by multiple seconds and was leading race 2 (and in a battle with an STU car) but the coolant expansion tank failed, resulting in an overheating engine which forced him to retire the race but not before improving on the track record

With one new track for most of our drivers under our belt, we can adjust the preparation in the simulator and the development plans for the test day and each of the on-track race sessions.

Thanks to the team, Ann, Dave, Simon, Ray, Seth and everyone from the Cal Club who made this weekend possible and making the most out of a pretty tough first race of the year.

Stay tuned for more of our adventures in 2022!

Posted on

2022 Race and Track Support Schedule

Racer on Rails 2022 Race and Track Support Schedule

2021 was a great way to bounce back from 2020 and while COVID isn’t behind us, we’re thankful that we were able to make it to all but one of the planned competition and racing events that we originally planned and even added in a couple of extra race weekends.

Thank you to everyone who was a part of our journey in 2021!

2022 is shaping up to be an even more jam packed with track action and while we’re mostly booked up for each event, we have limited available capacity to have you join us at the local .

If you aren’t already driving with us, consider this an open invitation. We are here to help!  Our current SCCA, ICSCC (Conference), NASA, Revolution Racing League and GT Celebration events are listed below. 

If there are any race weekends you would like some crew and coaching support for, please feel free to contact us via e-mail, phone or messenger – raceronrails@gmail.com – (206) 475-1114

2022 Race and Track Schedule:

Posted on

2021 Race and Track Support Schedule

Well, 2020 was a bit of a weird year. So what’s the best way to forget about it? Look forward to an awesome and packed 2021 racing and driving calendar.

We are in the business of making smiles and lifetime memories and one of the main ways we do this is by helping people get onto a track. We can help you with the car set up and care, as well as trying to improve the performance of both you and the vehicle. 

We want to announce and extend an open invite for those that are interested that we are here to help.  Our team has a calendar of events planned with room for additional support for each weekend as needed!  Our current SCCA, ICSCC (Conference) and Global Time Attack events are listed below.  If there are any race weekends you would like some crew and coaching support for, please feel free to contact us via e-mail, phone or messenger!  Let us help you be your best on track!

Give us an E-mail or call to discuss options! raceronrails@gmail.com – (206)475-1114

2021 Race and Track Schedule:

  • January 15 – 17: Auto Club Speedway SCCA Majors Tour – Fontana, CA
  • February 5 – 7: Circuit of the Americas SCCA Majors Tour – Austin, TX
  • February 19 – 21: Buttonwillow SCCA Majors/Hoosier Super Tour – Buttonwillow, CA
  • March 19 – 20: Thunderhill Raceway SCCA Majors Tour – Willows, CA
  • April 2 – 4: The Ridge Motorsports Park Global Time Attack – Shelton, WA
  • April 30 – May 2: Portland International Raceway Cascade Sports Car Club – Portland, OR
  • May 14 – 16: Pacific Raceways IRDC Tribute to the Volunteers – Kent, WA
  • May 28 – 30: Pacific Raceways SCCA Majors Tour – Kent, WA
  • June 4 – 6: Spokane County Raceway Park ICSCC – Spokane, WA
  • Jun 18 – 20: Portland International Raceway Cascade Sports Car Club – Portland, OR
  • July 16 – 18: Pacific Raceways IRDC Summer Classic – Kent, Washington
  • July 23 – 25: The Ridge Motorsports Park Global Time Attack – Shelton, WA
  • August 13 – 15: Portland International Raceway Cascade Sports Car Club Dash for Kids – Portland, OR
  • August 27-29: The Ridge Motorsports Park IRDC – Shelton, WA
  • September 28 – October 3: Indianapolis Motor Speedway SCCA Runoffs – Indianapolis, IN
  • October 16: Portland International Raceway 8 Hour Endurance Race – Portland, OR (tentative)
  • November 12 – 14: Buttonwillow Global Time Attack Final – Buttonwillow, CA
  • December 4 – 5: Circuit of the Americas World Racing League – Austin, TX
Posted on

2019 Race Support Schedule

The staple of what we do is provide service to the racing community.  One of the primary aspects of that is to be at the track, to help you with the car set up and care, as well as trying to improve the performance of both you and the vehicle.  We want to announce and extend an open invite for those that are interested that we are here to help.  Our team has a calendar of events planned with room for additional support for each weekend as needed!  Our current ICSCC Conference as well as intended NASA NorCal events and SOVERN events will be listed below.  If there are any race weekends you would like some crew and coaching support for, please feel free to contact us via e-mail, phone or messenger!  Let us help you be your best on track!

Give us an E-mail or call to discuss options! raceronrails@gmail.com – (206)475-1114

ICSCC Conference Event Schedule:

  • April 19-21 (Fri-Sun) – Mission Race Way Park – British Columbia
  • May 3-5 (Fri-Sun) – Portland International Raceway – Portland, Oregon
  • May 10-12 (Fri-Sun) – Pacific Raceways – Kent, Washington
  • May 31-Jun 2 (Fri-Sun) – Spokane County Raceway Park – Spokane, Washington
  • Jun 14-16 (Fri-Sun) – Portland International Raceway – Portland, Oregon
  • July 19-21 (Fri-Sun) – Pacific Raceways – Kent, Washington
  • Aug 16-18 (Fri-Sun) Portland International Raceway – Portland, Oregon
  • Aug 23-25 (Fri-Sun) – The Ridge Motorsports Park – Shelton, Washington

SOVERN:

  • June 7-9 (Fri-Sun) – Spokane County Raceway Park – Spokane, Washington
  • July 5-7 (Fri-Sun) – Pacific Raceways – Kent, Washington
  • July 26-28 (Fri-Sun) – Portland International Raceway – Portland, Oregon
  • Sep 7-9 (Fri-Sun) – Portland International Raceway – Portland, Oregon
  • Sep 27-29 (Fri-Sun) – Pacific Raceways – Kent, Washington
  • October 5-6 (Sat-Sun) – Maryhill Hill Climb – Mary Hill, Washington

NASA NorCal:

  • Mar 15-17 (Fri-Sun) – Sonoma Raceway – Sonoma, California
  • Aug 2-4 (Fri-Sun) – Thunderhill Raceway – Willows, California
  • Sep 14-16 (Fri-Sun) – Mid-Ohio Sports Car Course – Lexington, Ohio

Current Unavailable dates:

 – Mar 3-4 (Sat-Sun)

– April  25-29 (Thus-Mon)

 – June 6-10 (Thurs-Mon)

 – June 22-25 (Sat-Tues)

 – July 11-15 (Thurs-Mon)

 – Aug 29 – Sep 1 (Thurs – Mon)

 – Sep 19-23 (Thurs-Mon)

 – Oct 17-21 (Thurs-Mon)

Posted on

Track Walk: The Ridge Motorsports Park

Welcome to The Ridge!  The Ridge is the newest track in the Pacific Northwest that is generally available to the public (Vancouver Island Motorsports Park opened recently but is a private track).

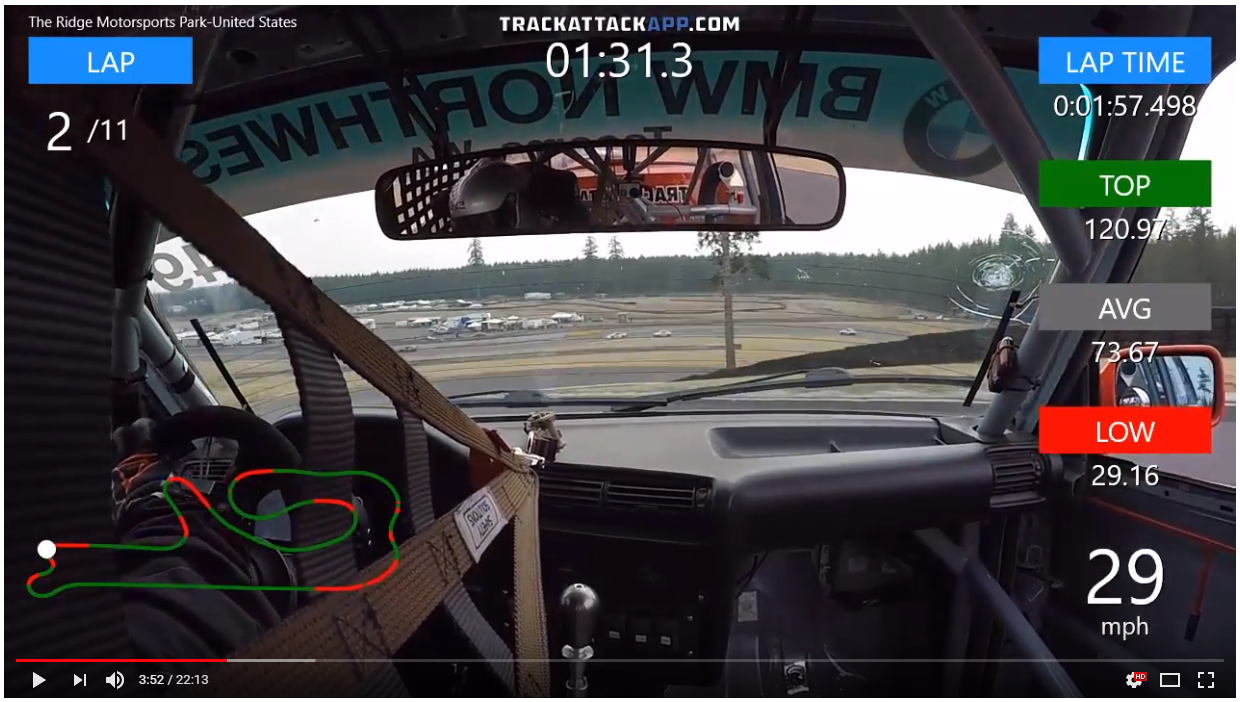
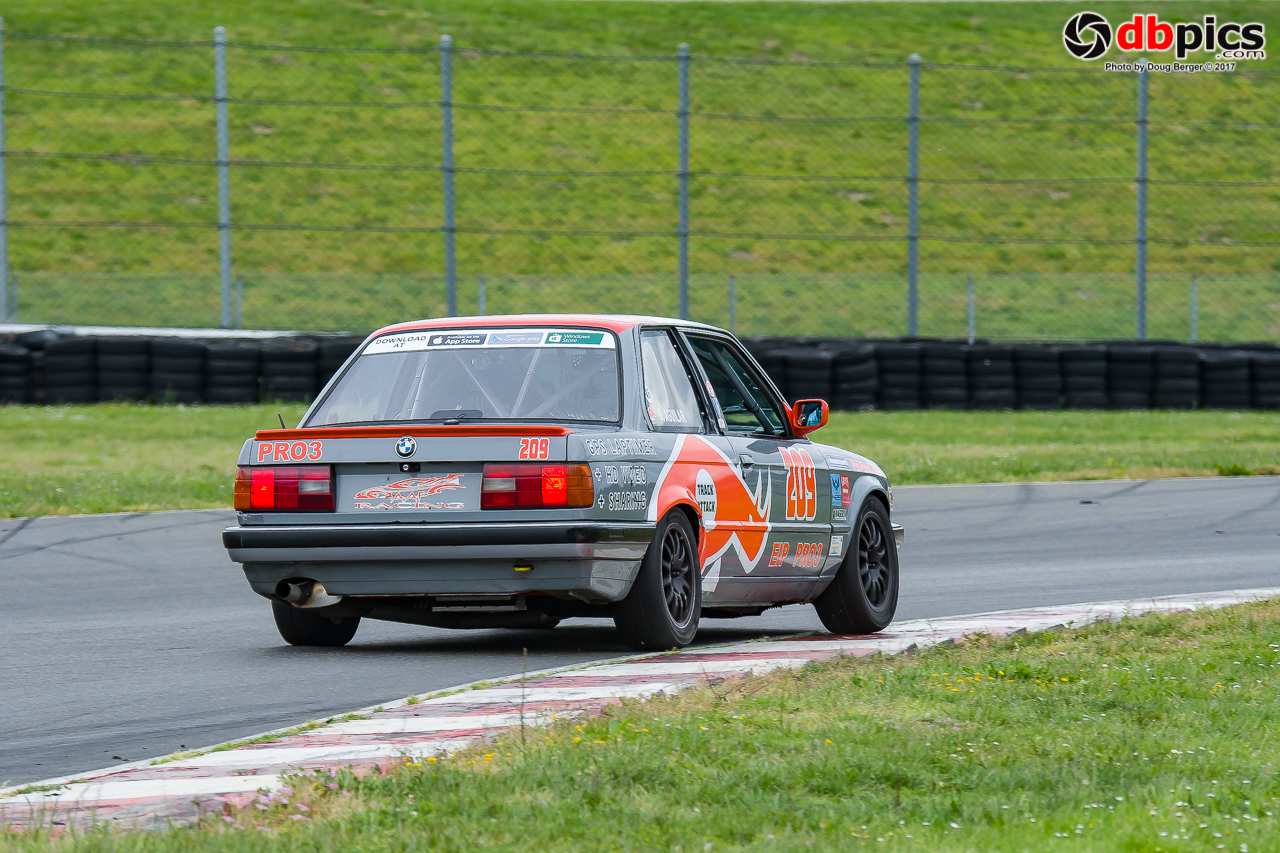
Similar to the Portland International Raceways (with a Chicane) track walk, we’ll use the Track Attack #209 PRO3 race car, a relatively low powered “momentum” car, to illustrate how to get around the track.  The session data we are  using for this is available here on Track Attack – feel free to request it.

We’ve also broken the track down into 6 segments, each segment is defined right before the major major braking/slowing down zones.

Braking a track down into sections, makes it easier for people ‘consume’ it and prioritize where to get focus.

Before you read on, watch this complete lap from a dry race in September of 2017.  Read the article and the re-watch the video.

YouTube player

Segment 1: The Uphill

This segment starts at s/f and goes all the way up to the first major braking zone (not including braking for T2) entering the Carousel.  The first thing here is that this segment is a 76ft climb in elevation.  The equivalent of an 8 story building.  Yeah.  So every single loss of mph as you make your way up the hill, will be penalized with a multiplier as you go uphill – keeping the momentum going is a top priority.

Momentum is important – check!  Turn 1 – get ready for a trouser check.  Turn 1, in some cars, can be taken flat, without lifting.  This is similar to T1 at Spokane but the distance between T1 apex and turn-in for T2 is not as long, so in cars that are faster than a Spec Miata, experiment with caution.  Personally, the most I’ve ever been able to get away with is a ~4/10 braking effort – just a tad more than a brush of the brakes, go back to tad of maintenance throttle and then back on the brakes, about the same amount for the downshift to 4th gear and then going back up the hill.

As you get the car past the apex of T2, it’s really important to get close to the curb of T3 but don’t take too big of a bite off of it, as it will send your car back to track-left, which is not the ideal line for the remainder of the complex.  Once you get to full-throttle, you absolutely cannot lift.  After T3, stay track-right, to setup a wide arch into T5 and then release the car to driver’s-right.  This whole time between T3 through T5, when you’re pinned to full throttle, you will feel the back end wanting to step out.  That’s ok – simple counter steering corrections (small ones), while staying flat, will take care of them.

After this, it’s smooth sailing to The Carousel – find a straight line to follow, that will set you up on track-right, for T6 (The Carousel), which is a long, flat left-hand sweeper.

Segment 2: The Carousel

This segment is just one corner.  Why?  It’s long and hard to get right.  This corner can be taken many ways but here is one that has proven well in racing and qualifying conditions.  Set yourself up track right but not necessarily right on the edge of the track.  Brake a little later than feels comfortable with a solid 6-7/10 effort and after the initial bite, start trailing off and turning into the corner, like if you were trying to double-apex the corner.

The backend may start to come out as you turn-in so get ready to catch the backend with some maintenance throttle.  Try to keep the car tucked in tight to the inside edge of the corner and if it washes out a little mid-corner, that’s ok and that just means you can back on throttle even more aggressively for corner-exit, because you don’t need as much steering input.

Don’t mind what looks like me driving off the course, that’s just a natural occurrence of margin of error of GPS signals and the stitching together of satellite images for maps.

About 35-40% through the corner, you want to be on-throttle and free here on out, you don’t lift.  Start your ascension to full-throttle and as you feel the backend come out, pause the throttle application and give it a steering correction but DO NOT LIFT!  For me, there is a single, tall tree out in the horizon of this corner and the instant I see that tree, I go full-throttle, no matter where I am.

From here, let the car release all the way to track-right, the very edge if needed.  A lot of people don’t get out here because they want to setup far left for the next segment and that’s a trade-off you can decide to make.

Segment 3: The Thumb

This is one of the trickiest parts of the track.  It combines a big compression and low-speed traction event at 8a and 8b but also a super hard, decreasing radius turn at T11 (aka The Thumb).

As you come out of The Carousel, it’s ok to stay driver’s left and then draw a straight line as you go downhill at 8a.  Stay on throttle until right before you feel the ground fall away, lift and synchronize the compression event with your braking.  When you do this right, you don’t need to brake as hard because the compression event gives more bite to front-end.  Downshift (if you have to), wait for the car to rotate a tick and then get back to maintenance throttle.  You want to get on full throttle here as quickly as you can but the sliding plus the acceleration means that it will be really easy to get on-power over-steer, so be aggressive but careful with your throttle application.  After you get to full throttle, it’s a full throttle ride all the way up the hill, which is another 36 foot climb (almost a 4 story building).  Every mph you unnecessarily drop or every split second of having to lift from throttle, will make you pay dearly at the top of the hill.

Where you brake for the thumb will be determined by the car and how fast you’re going.  In a PRO3 car, the engine is spinning at 6,500RPM and ~103mph and we wait to come off throttle just before the curbing on the left and are well into the brakes at those curbs.

You don’t need to track all the way to driver’s right to setup for the thumb, about mid-track is fine in most cars.  Next, is one of the hardest corners to get right – find the late apex and make it your job to hit that curbing with your LF tires.  Getting on those tires, in 3rd gear (in many cars, 2nd gear in Spec Miatas), means you can get on the throttle hard and have plenty of room on the exit of the corner.  Be ready for the car to wash out and go on the exit curbing and maybe even drop a rear tire on the exit of the corner but that’s ok – DO NOT LIFT!

Segment 4 & 5: The Ridge Straight

I’ve broken this segment into two segments because it contains two corners, which are taken very differently and I wanted to leave the last segment being the last corners before the front straight away.

First is the very deceiving Turn 12 right-hander.  It’s deceiving because you can actually car a good amount of speed here and the corner opens up quite a bit on the exit, which means there is a plenty of room for corrections if you maybe got on-throttle too early.

The trick here is to get to the apex and be on full-throttle at the apex.  There is a bump or bulge right at the apex, which will feel like it kicks your car away as you hit but get to full-throttle, stay in it and ride it out.  You’ll almost for sure have the car sliding a little just past exit – a simple steering correction will get it back under you and you can keep going.  Then start making your way over to track-right, to setup for the Ridge complex.

As you approach the corner, you’ll see that the ground starts falling away in the middle of the braking zone – YIKES!!!  This means you have to have your heavy braking done before the ground starts falling away.  Looking at the data, the drop-off is a 7 foot decline in elevation over a 150 foot distance.  150 feet when you’re travelling at 75mph, goes by pretty fast, so this is a split second decision.

As you approach turn-in for the corner, stay on the brakes ever so slightly, so that when you turn in full, the noise is loaded up and will help rotate the car.  It’s ok to bite off a little bit of the curb but don’t get over zealous.

Give it some throttle as soon as you get past the corner, turn for the right hander and stick to track-right as much as you can.  If at all possible, stay off the brakes but you might need to brush the brakes to help the front-end bite.

Segment 6: The Front Straight

The lap is almost over!  You’re barreling down the Ridge Complex, a nearly 80 foot drop and you need to decide what to do for the last corner before the main straight away.  There are couple school’s of thought:

  1. Geometrical fastest line: Swing out wide, carrying more speed because you have a wider arc, a single late apex at Turn 15 and then pin the throttle down until start/finish.
  2. Shortest distance line: Stay a little closer to the inside, use the banking in the corner, travel less distance and hit the apex of Turn 15 at the same spot.

This really depends on what kind of car you have and the track conditions on the outside of Turn 15.  In race weekends, that wide line isn’t used much, so there ends up being a lot of marbles out there.   Great for the rain but not for the dry.

At least in a PRO3 car, we have more grip than power, so as is with many of the other corners, the less distance we have to travel, the better so Option 2 is what you’ll see in the data.

Now, I can totally see an argument even for a PRO3 car to setup for a single flying lap to go super wide, throwing away the lap time for that current lap and setting up for a higher top speed going into Turn 1 or even setting up a competitor for a pass at the end of the straight.

You’ll see in the data that I’m on throttle about mid-corner and full-throttle at about 3/4 of the way of the corner.  After that, it’s about finding the straightest line possible through Turn 16 and the least amount of steering input all the way down the front straight away.

Conclusion: The Ridge is awesome.  Go drive it!

The Ridge is really a fun track.  Newer and well take cared of pavement and plenty of run off room in most corners.  You can get in trouble and it makes you pay but most of the time, it’s dirt and rocks on your car to go along with a bruised ego.

The facilities are constantly improving and with a motocross and a kart track that is a mini version of the big track, there’s few places that can compare.  The downside is that it is located about 30 minutes northwest of Olympia, WA and Shelton has limited hotels but coming out in an RV or camping, is an absolute blast.  Best of all, there are no drag races so every evening, you can do a complete track walk.

Check out the The Ridge Motorsports Park website and Motorsportsreg.com for upcoming events you can sign up for, to drive the Ridge!


Posted on

Track Walk: Portland International Raceways

In a couple weekends, we’re headed back to Portland International Raceways and the first time I’ll get to drive the track for more than one session (in real life) this year and since I was on the Speed Secrets Podcast, earlier in the spring.  I got some live coaching from Ross Bentley and have been excited to implement the tips I heard.  Check out the podcast episode here and subscribe – it’s an awesome podcast with a wide variety of guests and every time, I learn a ton.

So let’s take a lap around the track and go through each sector as defined by the sectors on Track Attack.  Below we’ll be using illustrations from real data from a pair of front-running “spec” racing class cars: my PRO3 and Will Schrader’s Spec Miata.  Both are considered low-power momentum cars but there is enough power and weight difference you’ll see different things happening.

If you are a Spec Miata or PRO3 driver in the Pacific Northwest (or have similar cars), you can request to join the respective teams on Track Attack and get access to the session data that we’re using in these examples. (Link to PRO3 data share team and Northwest Spec Miata Tour)

We’ve broken up PIR w/chicane into 4 sectors.  Each sector is a combination of corners and are split halfway through a ‘straight away’.

Elevation change: None

PIR is like the Lime Rock Park of the west coast.  In the chicane configuration, there are 7 right hand turns, compared to 2.5 left hand turns.  But unlike Lime Rock, the elevation change is near zero.  Check out this video where the data overlay shows the elevation change – there is just under 10 feet of total elevation change.

YouTube player

No real elevation change but there are still some tricks on banking that the track holds.

Segment 1: The festival chicane

The first segment starts at the start/finish line, of which the speed that is carried before the first braking zone is determined heavily by the exit out of T12 on the previous lap and if you might have caught a draft down the front straight.

Braking for T1 will depend on the car and whether its a qualifying lap or a race lap.  In a PRO3 car and a qualifying lap, you can hit the brakes hard right after passing the 400 board and what ends up being right before the 300 marker.  Note, this is hard to replicate lap after lap.  After hitting the brakes hard, start coming off of them and you should already be looking for the apex of T1.  It’s a good practice to put the right-side tires on the FIA curbing at the apex of T1 and even dropping a tire inside of the curbing isn’t bad but puts more stress on the suspension components.

Think about this: When are you releasing the brakes as you enter the corner for T1?  Play around with that.

You’ll want to take a line where you can hit T2 with a late apex.  Why?  There’s a decent straight-away from full-throttle at the exit of T2, all the way until T4.  Focus on doing what you can to get to full-throttle as soon as you possibly can coming out of T2.  Usually when I see data of someone really moving through this segment, it is all about the minimum speed they carry through T1 and how quickly they can get to full-throttle out of T2.  Clearly, there is a trade-off here but that’s the trick – finding the right balance and compromise for you and your car.

Also, the steering input for the change in direction to turn for T2 is relatively abrupt and hard.  Remember, slow speed –> fast hands, fast speed –> slow hands.

Comparing the lines of two front-running cars: Blue is a PRO3 car and Yellow is a Spec Miata.  What differences do you see?

Segment 2: No rest – Attack!

Segment 2 includes T4 – T6 and is one of the areas that separates good from great laps.  It can be easy to coast through this segment, but when you’re looking for the maximum lap time, you need to attack!

Same two cars: Yellow (Spec Miata) and Blue (PRO3). There is a 250-400lbs weight difference depending on the Spec Miata. Why do you think each car may be taking different lines?

T4 is somewhat of a false apex – you don’t absolutely have to hit the curbing but the benefits of staying closer to the curbing is that you travel less distance and you have more room to catch the car, if and when the car is upset by the bumps.  When you brake depends on your car but generally speaking, with the chicane, you can go pretty deep into the braking zone and brake pretty lightly relative to braking for T1.

Think about: As in segment 1, when are you coming off the brakes as you enter T4?

As you dive into the T4, the rear of the car may start sliding, which is a good thing!  Use maintenance throttle to settle it down and slowly start going to full throttle or modulating accordingly.  How much throttle you can give it will depend on the speed you carried through mid-corner and how well the rear-left suspension components are absorbing the bumps.  There is a lot of load on that rear-left, all the way through the exit of T5.  Is your suspension bottoming out?

As you approach T5, you’ll have to either breathe off the throttle to get the car to rotate or give it some very slight braking.  Get turned in and hit that curbing for T5.  Then give it as much throttle as it will take and let the car release to the driver’s left as you approach T6.

T6 has different schools of thought.  One school says sacrifice the corner and run the shortest distance possible.  The other says that you should hit the corner with a wide entry and get an amazing run towards T7, where you don’t flare out as much on the exit of T6.  I’ve seen data from both approaches and it’s really a toss-up.  Find what works best for you and your car.

Just remember that the outside of T6 is off-camber and usually has a ton of marbles.  You don’t want to be caught on the outside of T6 almost ever (save for rain) it will be slow and you will get passed.

Going fast through segment 2 should feel like you are on the ragged edge, having to catch the car slightly throughout the entire complex.  This is no time to rest – attack!

Segment 3: The banana straight!

In my opinion, this is the second most important segment of the track.  T7 leads onto the longest “straight” on the lap, so getting onto full throttle, without backing out is the most important thing here.

Where you determine your braking point will heavily depend on your car but the goal should always be to be at or near full throttle right at the apex of T7.

Can you see the ever so slight differences between the PRO3 (blue) and the Spec Miata (yellow)?

Think about: Where are your eyes when you are on the brakes for T7?  Get them on the apex as soon as you possibly can.

Use one fluid motion to get the steering input for the corner and when you are pointed at the apex, commit and get to full throttle as quickly as you can.  In all of my fastest laps, I have a healthy two tires on the T7 curbing and will have a slight slide on the exit, of which a quick steering correction will get it to stop and doesn’t require a lift.  Over slide on the exit or have to lift after apex and you are dead in the water.

Segment 4: Brown trousers

In my opinion, this is the most important complex of the lap.  It is the scariest and thus, even among good drivers, there is more variance in segment times than in any other segment.

The entry into T10 is the most important and it is much less about how late you can brake and more about how well balanced the car can be, as you carry a higher amount of speed through the corners.

Think about this: Will a car that is stood up on its nose because the driver braked super late, turn better than a car that is balanced front to back because the driver braked maybe a little earlier and lighter?

Some drivers can pull off (in a PRO3 car) braking at the 200 marker and keep the car balanced and others brake at the 300 and it works just as fine.  Figure out what works for you and your car.

Make it your job to always, and I mean always put tires on the drivers-left curbing of T10.  Then make as a straight of a line as you can to brake in a straight-line for T12.  This means that you might miss the curbing on T11.  That’s ok!

Brake in a straight line for T12, focus on when you’re going to release braking for T12 and get just like T7, get your eyes to the apex of T12 as quickly as you can.  Turn in with a single, smooth movement and just nibble or have a full tire on the curbing of T12.  This is slightly less important but if you do this, you’ll know for sure that you’ll have enough track on the exit and avoid hitting the tire walls for the drag strip (of which I’ve hit) or along the main wall.

As Ross suggested during the podcast, the goal is to get to full-throttle as quickly as possible.  If you find yourself near the apex of T12 and at 50-75% full-throttle, just give it the beans!  Go all the way and know that it might slide a little on the exit but you usually don’t need to lift to stop the sliding – a quick steering wheel correction will be plenty.

After that, it’s smooth sailing to start/finish.  Release the car and have the lightest hands on the steering wheel as possible.  Any steering input while at full-throttle is friction and friction means going slower.

Other things to consider

People say that Portland doesn’t use up brakes and tires and that’s sort of true but when you’re pushing, everything makes a difference.  Using the curbs is really important but also has led to pad knock-back for several drivers, which isn’t fun.

Track temperature makes a huge difference on available grip and can swing 20-40 degrees from the morning to the late afternoon.  That could make a difference of up to a second on lap times or more.

Catching a draft can also make a huge difference, upwards of .5 seconds on a lap.  So if you can get a tow early on the main or back straight aways, do it!

Track records are made on <100F surface temps, <80F air temperature, fresh tires, qualifying weight, a draft and putting it all together on the first 2-3 laps of a session.

That’s it!  Let us know what you think about the guide and feel free to comment and share any of your tips and tricks for PIR.  Do you do different things?  If so, share it and tell us why.

Posted on

The Impact of Drafting: Extra Data and Gluten Free

Shake and Bake!

We’ve long heard and talked about drafting and bump drafting – how they can make or break a qualifying time, depending on what kind of car you are in and what section of the track you can catch a tow. The fundamentals behind a draft are simple:

  1. The goal is to get from one point on the track to another point, as quickly as possible.
  2. You can do that by slowing down less through a corner (carrying a higher minimum speed). This could be through having ‘better’ tires for better grip, adding downforce for better grip, braking less and/or getting back on throttle quickly.
  3. You can also focus on accelerating faster between the two points by adding more power, reducing the friction on the accelerating drive-train (lightened flywheel, gears or driveshaft as examples), increasing grip on the tires that are driving acceleration OR reduce the forces that are barriers to accelerate through – such as the air itself (e.g. reducing down-force).

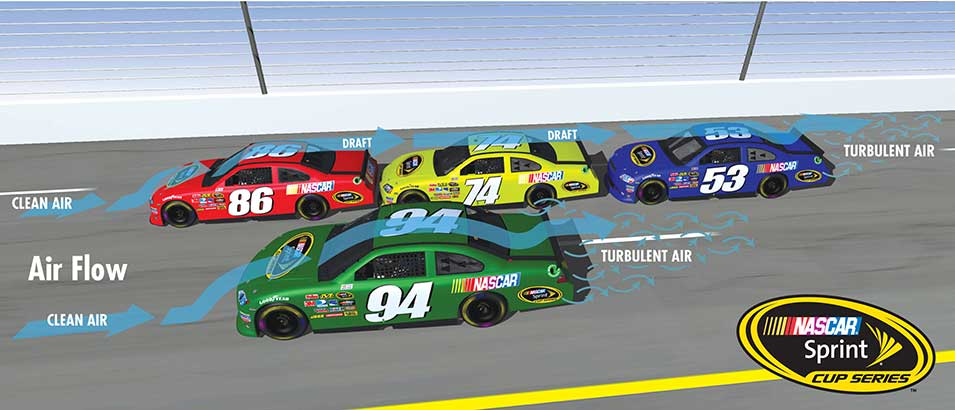
We’re going to assume that you are not in formula 1 or some other series that has active aero such as a Drag Reduction System (DRS), so the only option you have to reduce down-force is to have another car punch a hole in the air, for you.

I don’t get it – the air, is the air.  Why does this matter?

For the uninitiated, let’s take a minute and explain why this is important.  You know those videos of reporters that go outside and report on a big wind storm or hurricane?  They go in front of the camera and try to walk against the wind and they get pushed back or can barely move forward.  This is analogous to what your car is experiencing.  The reporter is trying to walk against a 100mph+ wind and your car is trying to drive through the air, at 100mph+.

YouTube player

When the reporter steps inside from the hurricane, it is much easier for them to walk, jog, run and even sprint!  The reporter not only moves faster but they use up less energy.

When a car is in front of your car on a race track, they are somewhat eliminating that “100mph” wind resistance, letting you step into a bubble of protection and as you get closer, that effect gets even stronger, making it almost feel like you and your car get sucked.

You gotta shake it, before you bake it!

Now we all know from the documentary/autobiography “Talladega Nights, The Ballad of Ricky Bobby“, that you can even use this to create a sling-shot effect.  Where the trailing car tucks into draft of a car, gets sucked in and at the very, very last-minute pops out and can motor past the car that gave them the “tow”.

YouTube player

Ok but for reals now – here is the real thing.

This is used quite often in wheel to wheel racing conditions and sometimes, can be used in qualifying or time attack situations, when the stars align.

What does a draft look from the data perspective?

Below is a session from Spokane County raceways in June 2017.  Spokane is an old school track with a very long straight away, 1,300+ yards long and in most cases, hitting near the rev limiter ( at the top of 5th gear in a PRO3 car.  At least in a PRO3 car, after exiting Turn 8, it’s full throttle past three turns, before braking for Turn 2.

On this day, it was a dry and windy Sunday, with qualifying in the AM and temperatures in the low 70’s.  I went out knowing that I had to setup to get my fastest laps in lap 3 or 4 – when tires would be in their optimal performance window. If I couldn’t get my target lap time then, I’d have to back off, let the tires cool off and have another go at it.

After getting things warmed up, I put together two flying laps where I felt like I gave it nearly my best and being one of only two people to get into the 1:37’s over the weekend lap time from Saturday.

Check out the gradual increase in lap time delta – usually evidence that one lap has a draft and the other doesn’t.

So, what do we have?

  1. The purple lap is where I caught an ok but not great draft.
  2. Towards the end of the green lap is when I started catching the cars in front.
  3. Air Fuel Ratio seems to be about the same on both laps
  4. At the start of the lap, there was zero difference in lap time.
    1. As I start making it farther down the straight-away, the speed difference starts growing, reaching a peak of almost 2mph
    2. By the end of the straight-away and right before the brakes were hit, the green lap was already .188 seconds slower.

I felt like I had left some on the able and backed off to let things cool down for a couple laps and setup two more laps, trying to catch a draft on those as well.

This time, with some video evidence!  What happened:

  1. The red lap ended up being faster than the green lap but that was with not much of a draft.
  2. The red lap, I got a solid draft on the back straight away, where we’ll focus the analysis.
    1. Like the previous lap, the difference in straight-away speed was between 1-1.5mph, through the whole back straight.
    2. You can see the delta graph, where the green lap was shaping up to be just as good as the previous lap.
    3. Engine RPM was also consistently 50-100 RPM higher for the green lap, indicating that the it was able to rev more freely with the lower resistance from the air.

Unfortunately, the car that gave me the tow on the back straight, also didn’t give me the easiest of paths to go through turn 4 (which is totally within their right) and that essentially killed the lap.

Conclusion: The draft is strong!

There is a ton of variables that go into determining the impact of the draft, such as the weather conditions, the track and the type of car.  In this case, with a PRO3 car, which is more of an aerodynamic brick, having something else punch a hole in the air made a difference of .15-.2 seconds on each of the straight-aways.

I think that if I could have lined up a draft on both straights, it could have reduced each of those fast laps by another .2 seconds at least.  How big of a deal is this?  I lost pole position on both days but less than .1 seconds.  In fact, in this video below – we took the video of the fastest segments from that session, stitched them together and this would have been a 1:37.437 – almost .5 seconds faster than the fastest lap and .2 seconds faster than my fastest rolling lap.

YouTube player

This has generally been what I’ve experienced at most tracks on the calendar because each as a decent straight-away.

Catching a draft in qualifying versus in a race is the same but it is very difficult to control this in a race.  My suggestion is if you can, work with another driver and help each other out.  Take turns having one car have a go at it and then switch, allowing that switch lap to when you let the tires cool down.

Working together is very common in karting and in light-weight and powered classes, like Spec Miata.  In the future, we’ll do a write up like this with a spec Miata and looking at the quantified impact of bump drafting!


Posted on

No training or exercise for 2 months = Not great performance

Surgery…

On July 7th, 2017 I went in for what was supposed to be a minor surgery.  I was diagnosed with a non-cancerous cyst, which is quite common except for it was located right on top of my tailbone (not on the tailbone but right next to it).  This meant that I was regularly sitting on it, especially when I would slouch.

It had originally come up 3 or 4 years ago after 6 months of karting all the time.  I thought it was just a result of all that trauma to my tailbone.  It was an annoyance but never very painful until this past June, during the second Portland International Raceways weekend.  After the first day of testing, I woke up sore all over my body and my cyst was really tender.

YouTube player

I ignored all the pain and discomfort and made it through the weekend but went to the doctor the following week.  It turned out that my cyst had gotten so swollen, it was infected and those body aches, were my body fighting the infection.

Long story short, I needed surgery to have it completely removed.  It is a straight-forward procedure and usually within a week, someone can go back to normal activities, but because of the location, the recovery was at least 2 weeks and possibly up to 2 months before feeling ‘normal’ again.  Well for me, it ended up being the 2 months.

+ Bad Decisions

For 2 months, I wasn’t able to workout, do much simulator training and was on various combinations of pain medications.  2 weeks after the surgery, I decided to compete in a race at Pacific Raceways, where I got pole and finished P2 but I needed help getting into the car, out of the car and was icing my incision all day long.

A week after the Pacific race, I was reading to my kiddo and his friend, but I was also laid up, trying to take the load off my incision.

The next couple of weeks were really tough.  I don’t know how differently or faster things would have healed if I had not raced but I think it slowed things down.  A checkup with the surgeon a couple weeks later showed everything looked good but she was surprised to hear that I was in so much pain.

I headed her advice and just tried to rest up, sprinkling in some yoga and days of more walking.  1.5 months after the surgery was the August 19-20 Dash for Kids race, back at Portland International Raceways.

Our setup at Portland International Raceways

= Sub-Par Performance

During the race weekend, we decided to hit the ‘reset’ button on our suspension setup, seeking coaching and advice from the 2016 PRO3 Champion, Olivier Henrichot (a future post on that experience).  We made dramatic changes to the setup, where in the end, I was able to hit the same lap times as before, with less of an effort and more confidence in feedback from the car.

All good things except, I was beat.  On Friday, we had 4 total on-track session and I awoke on Saturday AM, full-body sore.  Saturday, was a typical day of practice, qualifying and the 1-hour race, of which this time, I was splitting seat time with Olivier. We won the race but I again felt beat, after a 30 minute stint.

The next morning, we only had qualifying in the AM and the main race in the afternoon; not a ton of physical workout time.  I qualified P2 and was ready to go for the win during the race.  But about 5 laps into the race, my lower back started hurting.  Halfway through the race, it was throbbing and I was actively thinking about it during the front and back straightaways.  Not a good.

Qualified P2 for the main PRO3 race on Sunday

Long story short, I did not perform anywhere near my full or regular potential and one big reason that I was just not physically fit enough.  Here is the race video from the weekend, of which again, isn’t all bad and 1 year ago, I would have been thrilled to finish P3.

YouTube player

But How Did I Do So Well at Pacific?

I’m not entirely sure but I think that while I was in pain during the race, I still had more of my strength, stamina and was also on lots of Ibuprofen, which could have masked some of the pain.  At Portland, I think my strength, stamina and reflexes were not at the same level.  This variables resulted in a heavier mental toll and it started impacting me even worse.

At the end of the day, it’s not like I really sucked.  I still finished on the podium, against a couple of strong drivers that I’ve battled with all year.  Jeff McAffer, who overtook me for P2, had a really strong race, with the fastest lap of the race.  Olivier and I also won the 1-Hour endurance race!

The main point is that to perform at or near peak levels, you need to be mentally and physically at your peak.  I know there are drivers that aren’t into physical fitness and they are solid, if not incredible drivers.  They have other strengths, such as functional fitness and years and years of experience.  I don’t have more than a few years of racing experience, so I rely on physical fitness as a way to compete.

Moving Forward

For me personally, I am much healthier now and turning my training back up.  It will be some time before I’m as physically as fit as before but that is the goal.  And if in the future, I am injured, I am going to bite the bullet and rest/heal properly before trying to get back into the cockpit.


Posted on

Walk This Way! Track Walks:

Looking out the pit-lane exit at Circut of the Americas

What: Track walks, why you like them, even if you don’t know it yet

If I knew then, What I know now:  I would have studied harder on these when I was younger.  I would be a better driver and team member overall, now as a result.

Walking the track before an event is a very important part of your race or track weekend.  It spreads across all forms of motorsports, and any amount of wheels used.  Getting your feet on the same ground you will be driving your car on will give you valuable perspective regarding placement or the vehicle, surface conditions, line options and so on.  It is a great way to get the track layout in your head prior to getting into or on your machine.  There are a couple of key things to pay attention to and try to do while on a track walk.  I will try to outline some of them to help you get the most out of your next track walk.  I will start with some of my experience from the first events I went to as a young lad in high school with my buddies.

A group of friends of mine in school were also into cars.  We would set up a couple of days a year where we would all meet up the day before an auto cross event, hang out at one of the guys cabins, and then take all of our cars to the event the next day.  Auto cross was a good introduction into motorsports as a driver for me.  The first day I went to an event was with the Porsche Club (PNW Region).  I had a little old VW Jetta that had some sticky tires on it.  We got to the event, stood through the drivers meeting, then everyone set out and walked around the course that had been set up.  A course walk at an auto cross is essential.  The track will never be the same from event to event, so getting a feel for the layout is an important first step.  Auto cross does not allow for a lot of set up and testing time, so getting the most out of your runs is key.   I learned how valuable it was.  I was able to pip my friend on our first time out, and he was driving a 911.  There were more events after that, and as I grew to understand the track walk it made perfect sense to me.

Flash forward 15 years and now we are doing track walks every week we go to the track.  I went out and rode a new Motocross track a few weeks back – I did not get a chance to walk it, but I took 4-5 laps at just above a walking pace just to feel the place out – 2 laps later I was ripping around just fine.   We will often times end our first night at the track with a track walk.  It is a great way to wind down after a work day, and also a good way to walk some miles if you did not get a chance to before!  My first race back after a couple of years of just crew work, I ended up racing at the Ridge in Shelton.  It is a place I had driven before, but it had been a while.  We took the time the night before the race to walk the track, twice actually.  It was great.  I had one of the instructors at the track walking with us and they provided great insight to where to place the car due to seems in the blacktop in braking zones.  Entry and exit lines were discussed.  Gear selection (which can depend a lot on your equipment) was discussed.  I felt a lot better after walking the track to just jump in the next day and go.  Everything was fresh in my mind again.

Elevated view of the turn 17-18 complex at Circut of the Americas

Gama asked me to do a track walk with him this weekend at Pacific Raceways in Kent.  We have a race this weekend in the Pro3 car and he will be the only driver for the team this weekend as Manu’s car had a mechanical issue we found during a post-race inspection (more on that later).  I was quick to agree, as I have had many track days there, and 2 school days at that track, but had never actually walked a full lap in all of my years.  I had been to points of the track, but not all of the way around on foot.  We will be walking the track tonight and I am going to make notes, and take pictures to share our experience with the walk!

We try to track walk every weekend.  it is good exercise, knowledge, and you will have a great feel for the layout the first time you are behind the wheel at speed.  Be prepared for a walk, and be prepared for weather as well!  Some tracks are large, and weather can be different from one side to the other.  One of the other things that will help you a lot with our track walk, is walking with someone with lots of knowledge of that track for insight.  Most racers are instructors also, so their points of view are sound usually!  Just walking the track can gain you a lot, but having someone there to compare notes and tips with is very beneficial.   Having someone that drives a similar vehicle is even better!